Benchmarking and Scaling WebSockets: Handling 60000 concurrent connections with Kemal
I am the author of Kemal. Fast, Effective and Simple Web Framework written in amazing Crystal programming language.
I love benchmarks but unfortunately
Benchmarking is hard..
There are lots of good tools for benchmarking an HTTP server. Such as ab, wrk, siege.
My personal favorite is wrk. It’s quite handy and simple to use for HTTP benchmarking.
Benchmarking Websockets?
Back to original topic, my goal was:
Benchmark how many concurrent WebSocket connections can a single Kemal application handle?
Unfortunately when you want to benchmark a WebSocket server there are actually nearly no resources / tools.
There aren’t many tools to benchmark WebSockets.
I actually asked this on Twitter and also got no response.
Anyone know a fully featured tool for load testing / benchmarking WebSocket based web applications? #web #benchmark #websocket
— Serdar Dogruyol セド (@sdogruyol) 13 Kasım 2016
Googling ‘Benchmarking Websockets’ gave me some results but most of them obsolete or not working anymore.
When i was just losing the hope, this post from Elixir Phoenix Blog saved my day.
Setup
Kemal Server
A Kemal application implementing a simple chat server is just great for this benchmark. Luckily we have kemal-chat. There’s just one minor difference for this benchmark. Just turn off logging with
# src/kemal_chat.cr
logging false
You need to have Crystal 0.19.4 installed to build and run the server. Check Crystal Installation Guide for more info.
git clone https://github.com/sdogruyol/kemal-chat
cd kemal-chat
crystal build --release src/kemal-chat.cr -o app
./app
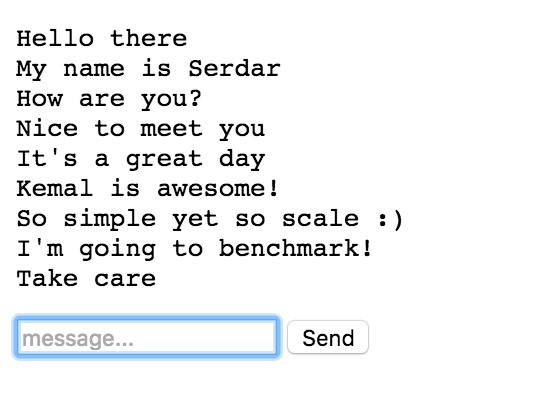
Now go to your IP_ADDRESS:3000/ and you should see something like this.

Tsung
Tsung is an open-source multi-protocol distributed load testing tool. It’s written in Erlang.
Tsung also supports benchmarking WebSocket protocol. Tsung configuration and scenarios are written in XML (i know it’s scary).

Installing Tsung is straightforward but there’s a pitfall. Be sure to use Ubuntu 16.04.
sudo apt-get update
sudo apt-get install tsung
tsung -v
1.5.1
Now that we have Tsung installed and ready to engage we need a configuration file. Like i said the configuration is in XML.
<?xml version="1.0"?>
<!DOCTYPE tsung SYSTEM "/user/share/tsung/tsung-1.0.dtd">
<tsung loglevel="notice" version="1.0">
  <clients>
    <client host="tsung-machine" use_controller_vm="false" maxusers="64000" />
    <client host="tsung-machine-2" use_controller_vm="false" maxusers="64000" />
  </clients>

  <servers>
    <server host="KEMAL_HOST_IP" port="3000" type="tcp" />
  </servers>

  <load>
    <arrivalphase phase="1" duration="100" unit="second">
      <users maxnumber="100000" arrivalrate="1000" unit="second" />
    </arrivalphase>
  </load>

  <sessions>
    <session name="websocket" probability="100" type="ts_websocket">
        <request>
             <websocket type="connect" path="/"></websocket>
        </request>

        <request subst="true">
            <websocket type="message">{"name":"Kemal"}</websocket>
        </request>

        <for var="i" from="1" to="100" incr="1">
          <thinktime value="10"/>
        </for>
    </session>
  </sessions>
</tsung>
This XML configuration seems a bit complicated. Here are the important things that you should be aware of.
<client>is a Tsung machine. If you are running Tsung in a distributed mode (multiple Tsung servers) you need to edit your/etc/hostsand add your Tsung servers like this.
tsung-machine 34.55.199.22
tsung-machine-2 34.55.199.23
Tsung uses SSH authentication to access workers. That’s why you need to generate a public key in your Tsung master machine in this case tsung-machine and add it to tsung-machine-2’s .ssh/authorized_keys.
On tsung-machine
ssh-keygen -t rsa
Generating public/private rsa key pair.
Enter file in which to save the key (/home/tsung-machine/.ssh/id_rsa):
Enter passphrase (empty for no passphrase):
Enter same passphrase again:
Your identification has been saved in /home/tsung-machine/.ssh/id_rsa.
Your public key has been saved in /home/tsung-machine/.ssh/id_rsa.pub.
cat id-rsa.pub
Copy the output of cat. On tsung-machine-2
vim .ssh/authorized_keys
And paste tsung-machine’s id-rsa.pub.
Now try to SSH into tsung-machine-2 from tsung-machine.
Congrats, now you have a distributed Tsung cluster.
<server>is your application. In this case it’s ourKemalapplication.<load>specifies our load configuration. In this case we are going with 1000 users per second up to 100000 users for 100 seconds.<session>specifies your session scenario for each scenario. In this case we are going to open a WebSocket connection on/send a message with{"name":"Kemal"}body then hold the connection open for 1000 seconds(which is longer enough for our whole test).
Here is how our server cluster looks like.

Benchmark
We got everything setup for our benchmark. Assuming that the configuration file is websocket.xml
here’s what you need to run.
tsung -f websocket.xml start
The first try
The first try actually didn’t go well. I couldn’t get Tsung to put enough load to push Kemal and just got 1k connections. Seemed like the default Operating System configurations were not enough.
Configuring OS for high load
A quick research on how to make Ubuntu 16.04 suitable for high connection / high load handed me these.
sysctl -w fs.file-max=1000000
sysctl -w fs.nr_open=1000000
ulimit -n 1000000
sysctl -w net.ipv4.tcp_mem='10000000 10000000 10000000'
sysctl -w net.ipv4.tcp_rmem='1024 4096 16384'
sysctl -w net.ipv4.tcp_wmem='1024 4096 16384'
sysctl -w net.core.rmem_max=16384
sysctl -w net.core.wmem_max=16384
I’m not going into details for but this configuration will allow Tsung to generate as much as load as possible.
Again!
This time Tsung generated enough load to actually push Kemal to the limit.
Kemal handles 28231 concurrent WebSocket connections on a 512 MB / 1 CPU @digitalocean droplet pic.twitter.com/nUnetmqgh4
— Serdar Dogruyol セド (@sdogruyol) 13 Kasım 2016
Time to upgrade Kemal server
Kemal server was a 1 CPU / 512 MB DigitalOcean droplet. Naturally i upgraded it to 2 CPU / 2 GB.
Running Tsung again gave me a surprise because i couldn’t see any significant difference.
My app instance running Kemal gets stuck at 29238 concurrent connections, it has more ram / cpu to spare. It's on Ubuntu 14.04. Any ideas?
— Serdar Dogruyol セド (@sdogruyol) 13 Kasım 2016
After some googling i found out that the default port ranges on Ubuntu was the limit.
sysctl -w net.ipv4.ip_local_port_range="1024 64000"
did the trick.
Final results
Now that the OS is not the bottleneck Tsung servers pushed the limits again :)
Kemal handling 61189 concurrent WebSocket connections on a 2 GB server. This is not the limit but benchmarking is hard @CrystalLanguage pic.twitter.com/y2GDow3J6e
— Serdar Dogruyol セド (@sdogruyol) 13 Kasım 2016
Kemal Handling 61189 concurrent WebSocket connections :) It’s not the limit but the end for now.
Happy Crystalling <3
P.S: If you like this, please follow Kemal on Twitter for updates and blog posts like this.

Leave a Comment